
Abstract
This white paper documents the procedure for installing a Bluetooth device and the proper communication settings for wireless PMI Recorders using ProVision software.
PMI offers several power quality recorders for capturing extensive PQ issues and disturbances. With many installations at or near hazardous live voltages, it is necessary to think about the needs and safety of the people monitoring the equipment. The use of wireless communications in the Eagle, Guardian and Revolution recorders reduces the dangers from arc flash and hazardous voltage, by eliminating the need for a physical connection. (The Revolution can also be purchased with a cell modem for access anywhere you have an internet connection.) In order to make use of these wireless devices we need to first learn how to set them up for use in our ProVision software.
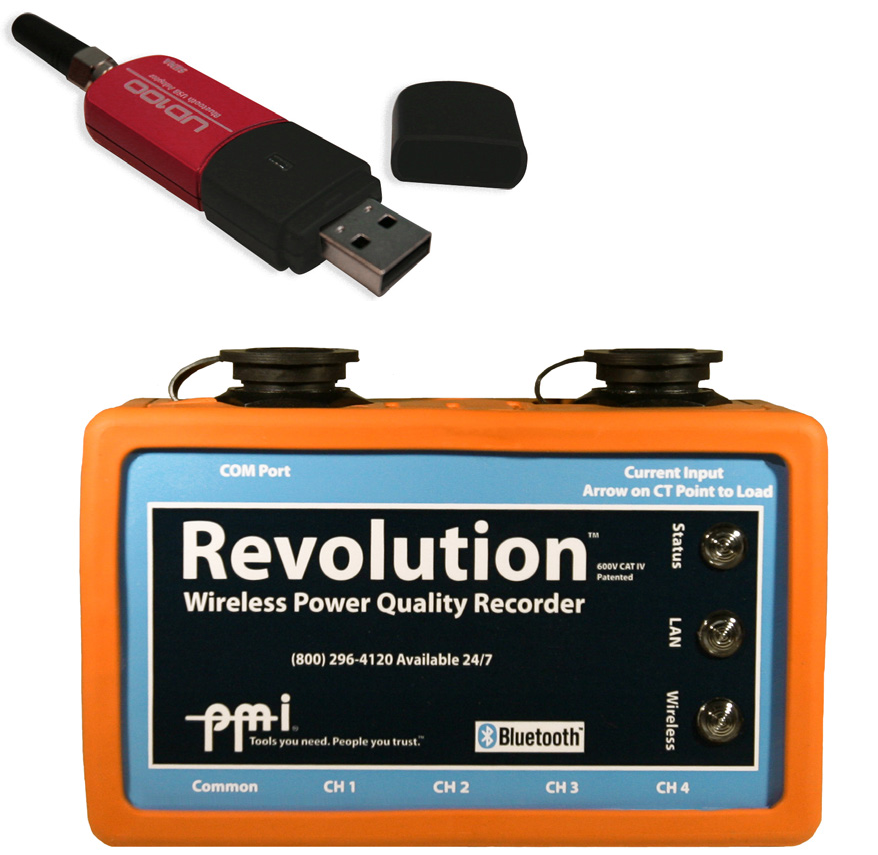
Bluetooth is an optional add-on for the Eagle 120. Revolution (Figure 1, above) models may be purchased as either the standard Bluetooth model or with a cell modem option. Bluetooth is standard with the Guardian meter socket recorder, the Eagle 220, 330, 440, and Eagle 200 meter kit.
Bluetooth Communications
Bluetooth communications are offered as a feature with several of our product lines as previously mentioned. Make sure you have the Bluetooth option installed on your Recorder before making a Bluetooth connection. Bluetooth is a wireless data transfer protocol that is setup on a computer as a virtual COM port. It is necessary to have a computer with internal Bluetooth or purchase our external USB Bluetooth adapter before attempting to make this connection. The PMI external USB Bluetooth adapter features a Class 1 high power radio, and most importantly, a small external antenna. An external antenna can significantly increase the range of a Bluetooth link, which is especially important if the PQ recorder is inside a panel or transformer enclosure.
These are the basic steps to configure and initiate a Bluetooth connection with ProVision:
- Add the PQ recorder as a virtual COM port device in Windows
- If prompted, enter the Bluetooth pairing key (“pmi”)
- Add the new virtual COM port as a new connection in ProVision
- Optionally, name the new connection with the recorder name/serial number
- Connect with ProVision using the newly created connection
Once configured, steps 1-4 do not have to be performed again for the same device. With some Bluetooth adapter drivers, it may be necessary to re-initiate a Bluetooth link in the Windows Device Manager again before ProVision attempts a connection.
An example walk-through of these steps follow for the Windows 7 operating system. Note: These instructions are generic and may differ from computer to computer; please contact your computer technical support for more specific instructions on creating this connection.
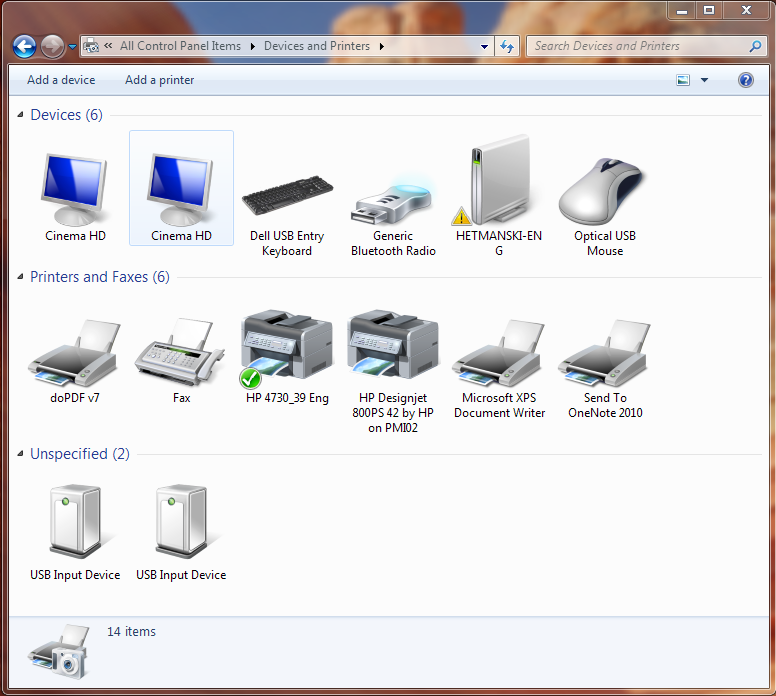
Turn on the Bluetooth adapter on your computer and create a new connection by going to the Control Panel and clicking -> Devices and Printers. The devices dialog box will appear as shown in Figure 2.
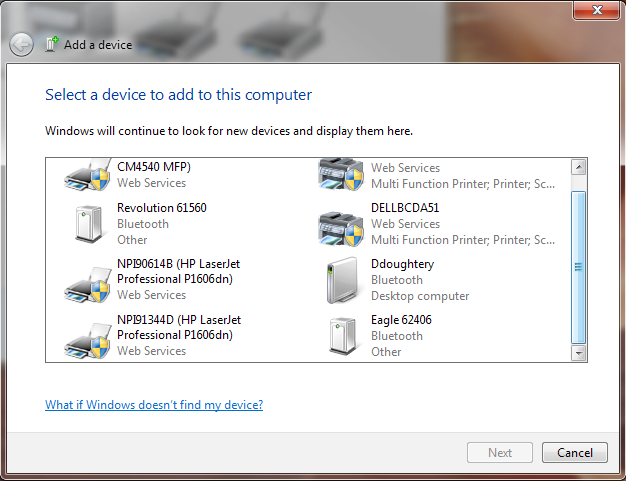
To add a new device – click -> Add a Device and wait for the Add Bluetooth Device Wizard to appear (Figure 3). Highlight the unit you wish to connect with and click “Next” at the bottom of the dialog box. The Device Wizard will show up on the second line of the description, showing that the Device is indeed Bluetooth-compatible.
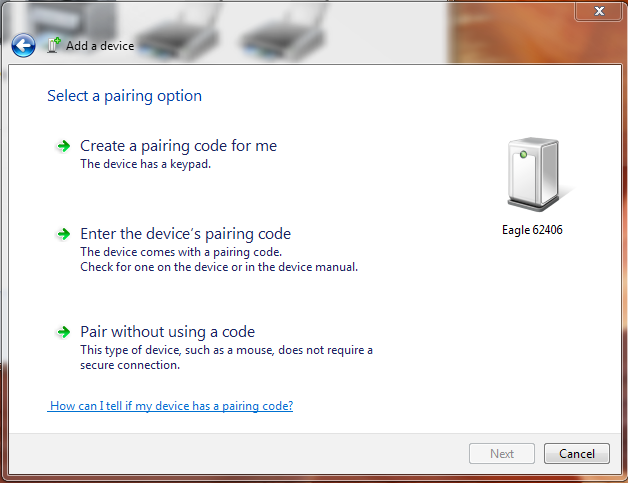
Pairing Option – The pairing option is a security feature used by most Bluetooth devices. To enable the pairing click -> Enter the device’s pairing code as shown in Figure 4. Then click “Next” to proceed to the passkey exchange.
The Pairing Code for PMI products is “pmi,” all in lowercase, with no punctuation. Click -> Next to proceed to the pairing code exchange, as shown in Figure 5.
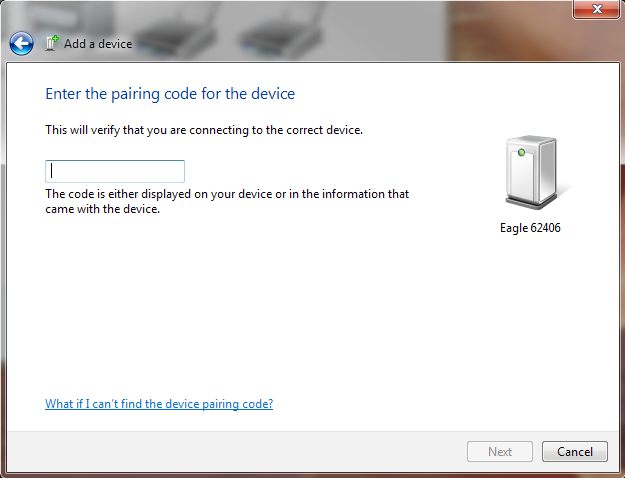
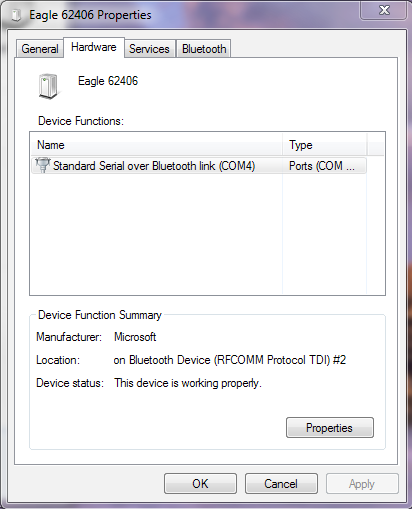
Code Exchange – The Wizard will try and exchange the code security information with the PMI Recorder and connect. Once the connection is made the Wizard will be completed. To view the assigned port information, right click on the added device and click -> Properties. Under the Hardware Tab, you can see the assigned virtual COM port for the PMI recorder, as shown in Figure 6. The port information (in this case port 4) is needed to create the connection with the ProVision software. Please note that the assigned com port will change depending on the unit and computer used for communication purposes.
ProVision Setup
In order to use the Bluetooth Recorder with the ProVision Software, the communication settings in ProVision need to be created. Below are the steps needed to create the Bluetooth connection. For this example, ProVision version 1.61 is being used.
Open a new instance of ProVision. Under the Options tab, click -> Communication Port Settings.
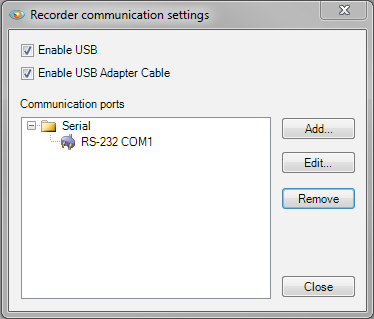
Recorder Communication Settings – Under Options click -> Communications Port Settings, and the Dialog box will appear (as shown in Figure 7).
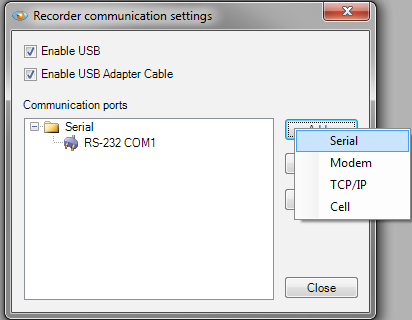
Add Connection – Click -> “Add” and then select “Serial” as shown in Figure 8.
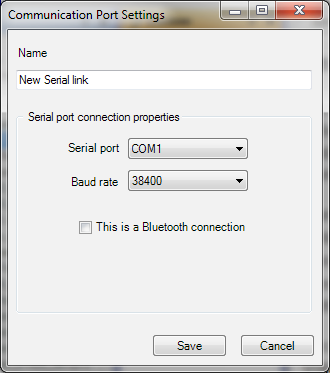
Connection Properties – After the Serial Link is added, the Connection Properties Dialog box will appear (as shown in Figure 9).
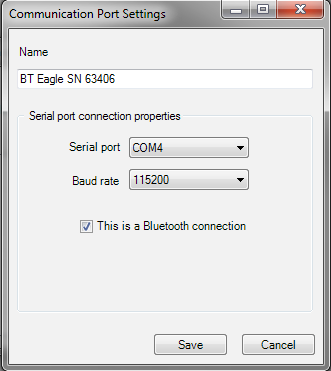
Name – In the name window, create a custom name for your Bluetooth Link to the recorder. Hint: Choose a name for the specific Recorder you are using and add the serial number to identify the exact unit. For example: BT Eagle SN 62406 (shown in Figure 10).
Serial Port – Choose the serial port that will be used on your computer. Note: This is the port information given by the Windows Bluetooth driver in the previous step. Select the COM Port that was assigned. For example: The port from the previous Windows driver setup (Figure 6) was COM 4, as shown in Figure 10.
Baud Rate – The baud rate is the speed at which the serial port transfers data to and from the connected device. This setting has no interaction with the Windows Bluetooth driver and is not required.
Check Box – Check the box to indicate that this will be a Bluetooth Connection.
Save – After all parameters are set in the connection properties dialog, click -> Save.
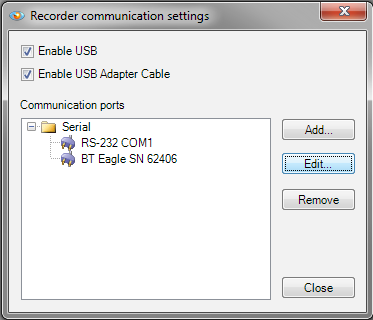
Communication Ports – After successfully creating a new Bluetooth connection, the port will appear as shown in Figure 11.
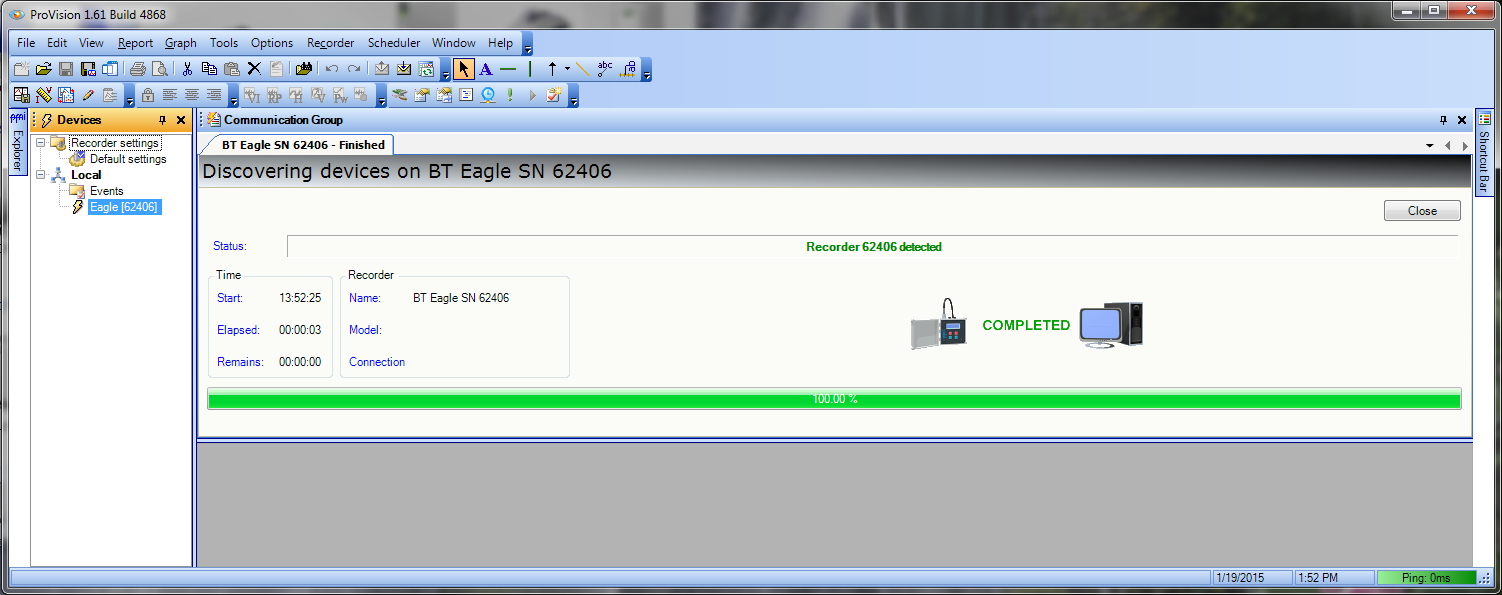
Connecting to a Recorder – After powering the Bluetooth Recorder via AC Voltage on CH1, click -> Recorder -> Connect Recorder, and select the “New Bluetooth” connection. ProVision will scan for the connected Recorder on COM4 and connect, as shown in Figure 12. After the connection is complete, you can interact with the recorder wirelessly. Now that you have established a connection with the desired unit, information can be transferred just like using a wired USB or RS232 connection.
Conclusion
Although this is by no means the only way to set up communications between ProVision and a PQ recorder, it is a simple-to-follow guide. Once configured, a wireless Bluetooth connection is quick to initiate, and allows for real time data viewing and recorded data download without opening a panel cover or retrieving a device from the top of a power pole.