
Abstract
Power Monitors’ PQ Canvass is the premiere way to view and analyze power quality data. Born from Canvass, our first generation cloud-based system, PQ Canvass is a power platform to collect, analyze, and get alerts from field devices connected through LTE cell, WiFi, or Ethernet. With connected devices and PQ Canvass come instant alerts, unlimited PQ data storage, and powerful reporting tools.
Versatility is an important factor in PQ Canvass, allowing one to view data both in the office on a desktop, and on-the-go using a tablet or smartphone; the only requirement is a modern web browser.
Many PMI recording devices, including the Seeker, Guardian, and Tensor, can be connected to PQ Canvass to view streaming data from the device, enable email and SMS alerts on PQ or power events, view live waveforms, access recordings, initialize new recordings, and more.
User Interface
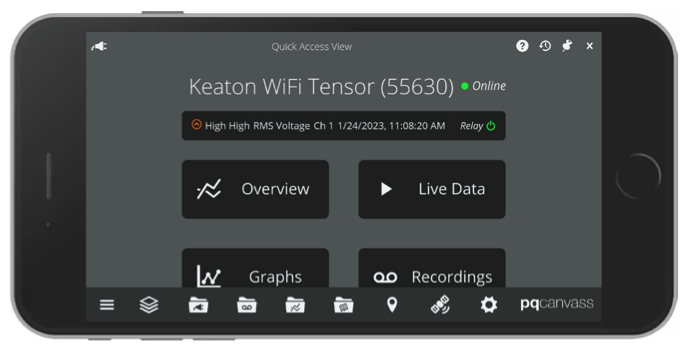
PQ Canvass is an intuitive and easy to use application, allowing anyone to utilize our devices to their fullest potential. The web application is mobile-friendly, allowing full operation on a smartphone, tablet, or desktop browser.
Dock
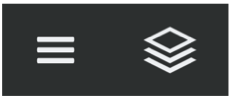
The dock is always visible no matter where you may find your-self in the application, providing access to the most commonly visited sections of the application, like devices and recordings, and task switching.

Main Menu
Opened by clicking the 3 horizontal lines in the lower left corner of the application, this menu provides access to account switching, adjusting the grid layout, the help center, and logging out.
Open Items
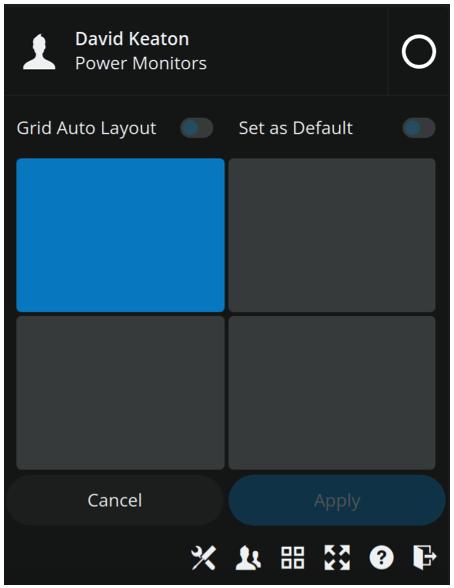
As one navigates PQ Canvass, the need to switch between opened windows becomes more crucial. Within the Open Items menu, one can switch to another currently open window, go to the user-defined “home” screen, and close allcurrently open windows.
Grid Layout
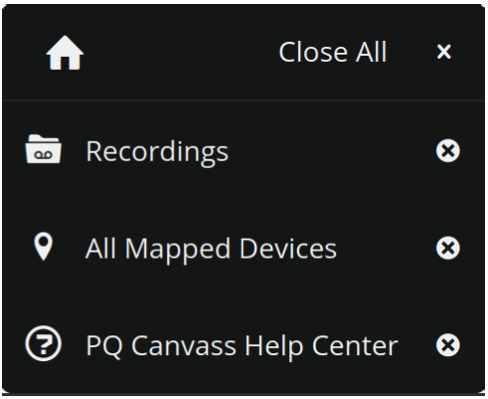
Multi-pane grid layouts can be beneficial if side-by-side data analysis or multi-tasking is wanted. A default grid layout every time you launch PQ Canvass can be set here.
Window Management
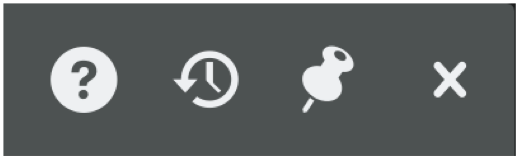
Extra utility actions for windows can be found on the upper right hand side of a window pane on its title bar. These include window pinning (for multi-pane grid layouts), contextual help, re-opening closed windows, and closing windows.
Help Center
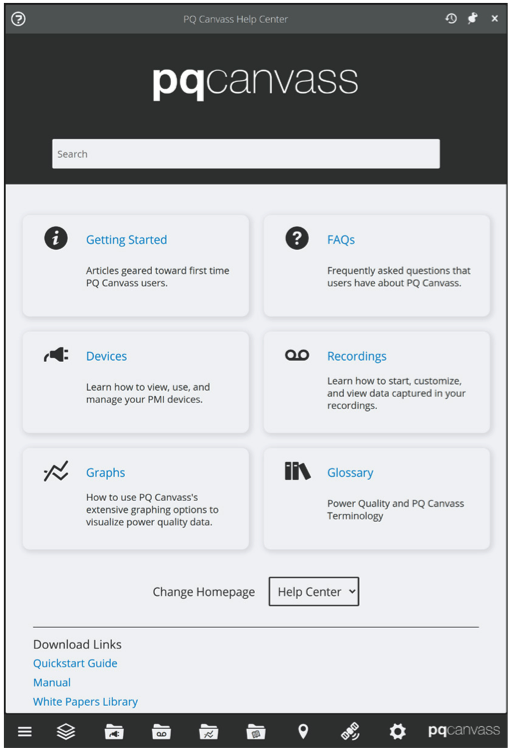
Whether a new user or a veteran, the Help Center provides an array of information about PQ Canvass to maximize its full potential.
Not only are there sections regarding devices and their recordings, but there are “getting started” articles to introduce new users to the features that lie in PQ Canvass.
Getting Started
It is recommended that new users read these articles in order to familiarize themselves with PQ Canvass.. These go over common functionality, related detailed information, and suggested uses.
FAQs
Instructional and informational frequently asked questions can be found here.
Glossary
A list of terms or concepts seen throughout the application can be found here, as well as their explanations or related articles.
Downloads / Links
The detailed Quickstart Guide and Manual can be downloaded in PDF form here. These give excellent overviews and details about every aspect of PQ Canvass in a portable format. A link to the Power Monitors White Papers Library is provided here as well, so the entire catalogue of our knowledge base is only a click away.
Device Map
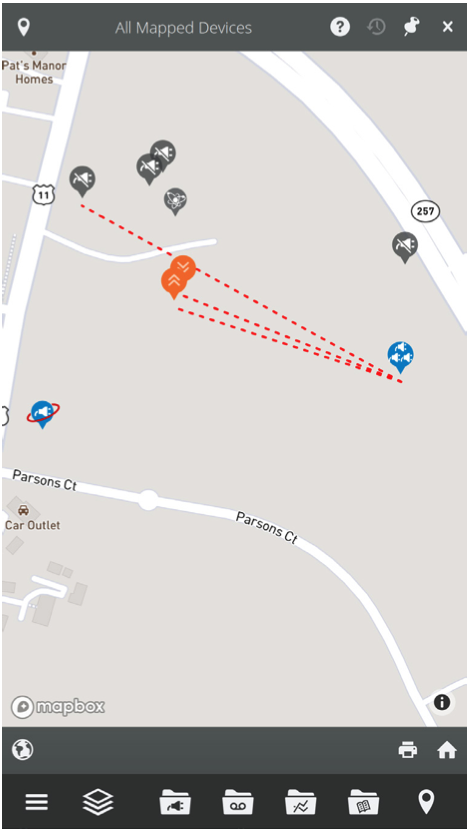
Devices that have their latitude and longitude set will show up in the Device Map. Pins will show the state, alerts, and information about the device at its location, and clicking on these pins will open the device for further analyzing and configuration.
3-Phase Groups
If any 3-Phase Groups have been defined, these devices and a line drawn between them will be displayed for that group. By clicking on the 3-Phase Group pin, further actions and analysis can be done on that group. (The 3-Phase Groups allow a user to connect three discrete recorders to each of three secondary phases on a transformer and then perform “group” operations on them, such as computing voltage unbalance.)
Devices
An account’s devices are listed in the Devices window, which is accessible from the Dock or Main Menu. Inside this window certain functionality, like Multiburst and 3-Phase Groups, can be accessed.
This list allows sorting and quick actions to be taken on each device, with various icons acting as shortcuts for the device as well (for example, clicking on the ‘signal’ icon will open live waveforms for the selected device if supported and online).

To sort the device list, the user can simply click the column by which they wish to sort.
3-Phase Groups (3θ)
To create or remove a 3-Phase Group, click on 3θ at the top toolbar of the Devices window. Add three devices together to allow support for graphs and calculations that typically require a multi-channeled device, such as voltage unbalance. Clicking graph allows the choice between interval, daily-profile, and histogram graphs.
Multiburst
To burst several different devices at once, click Multiburst in the top toolbar of the Devices window. Here, devices that are online and capable of bursting can be selected and burstsimultaneously. By default, any changes from the last burst are highlighted in blue.
Device Quick Access View
When selecting a device from the Devices list, the Quick Access View will open for that device. In this view, details and actions are listed for the device based on its functionality.
The tiles below the Status Area offer categorically arranged menus and actions. If viewing live waveforms is desired, for example, this can be found under Live Data. Starting a new recording can be found under Recordings.
This replaces what were the Basic and Advanced views present in prior versions of PQ Canvass.
Status Area
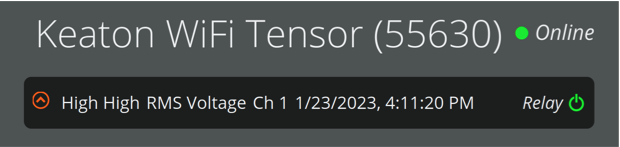
At the top of the Quick Access View is the status area, which displays device label and serial number, whether it’s online or offline, latest alerts, relays (if supported), and GPS lock status (if supported).
When more alerts are present than can be displayed, an ellipses (…) will be displayed, and clicking on it will display the full device status.
Relays can be toggled on and off by clicking the power button next to “Relay”. Doing this will require the device’s admin password. Once entered correctly and as long as the Quick Access View window is visible, this won’t be required again for the remainder of the session.
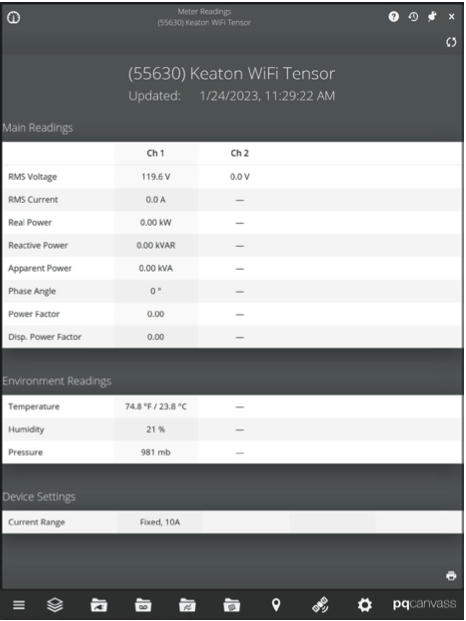
Live Meters
In the Live Data section, the user can find Live Meters (in addition to the Live Waveforms and Burst options). These readings can be used to see, in real time, what the device is currently reading or diagnostics information. This information can be useful for immediate analysis of data, or if new recording settings are valid.
Initialization
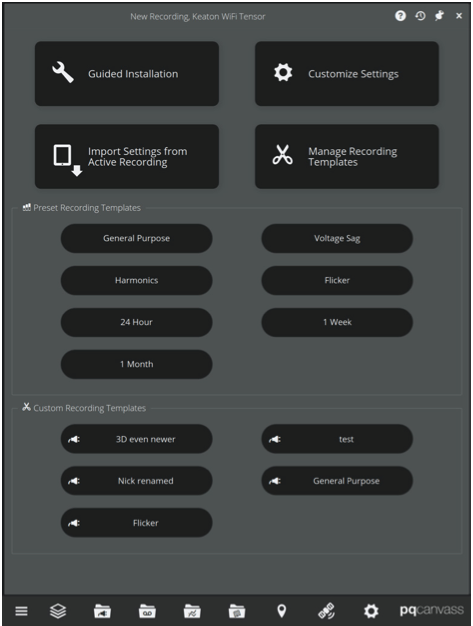
Device recordings provide a multitude of features and power quality information, and with recent additions, initializing a new recording is now easier and more intuitive than ever. Starting a new recording can be done under the Quick Access View for a particular device, under the Recordings section.
Guided Installation
With the advent of Guided Installation, one can focus on only the important details, and we will handle the rest. Broken down into only a handful of steps, getting a recording started has never been easier! Plus, if you want more fine-tuned, granular control of the new recording, clicking the Advanced button when setting parameters after selecting a template will give you access to every setting under the hood available for that device, and allow you to export the template for future use and sharing to others.
Importing Settings
If only a handful of changes are needed to the current recording for a device, or the parameters are deemed good for a template, importing its settings allows one to do just that. Both the simple and advanced modification of recording settings can be done after imported.
Managing Templates
Created templates can be shared, renamed, or deleted after they are made. To use a custom or shared template, the template will be listed on the main initialization screen underneath our customizable presets.
Recordings
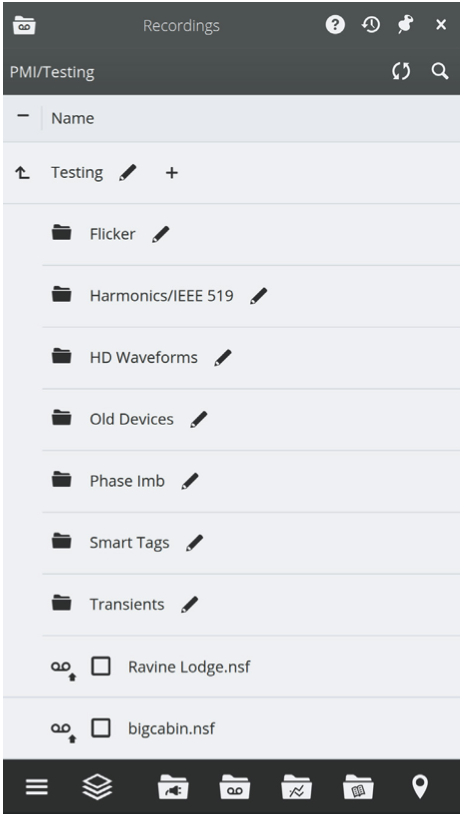
An account’s recordings are listed in the Recordings window, accessible from the Main Menu and the Dock. Custom directory hierarchies and tagging can be done in this window, and even uploaded ProVision recordings can be found in Provision Sync.
Directories and Tagging
Added to the latest versions of PQ Canvass is the ability to hierarchically organize recordings into directories. Additionally, smart tagging, if preferred, can organize recordings, such as by recording date.
Any recordings one has shared with them can be found in the Shared With Me Directory.
Waveform Captures
Waveforms, and GPS timestamped waveforms (for devices that support it), can be found in a recording. For GPS waveforms, correlation between other waveforms that triggered at or near the same time are available to assist with analysis.
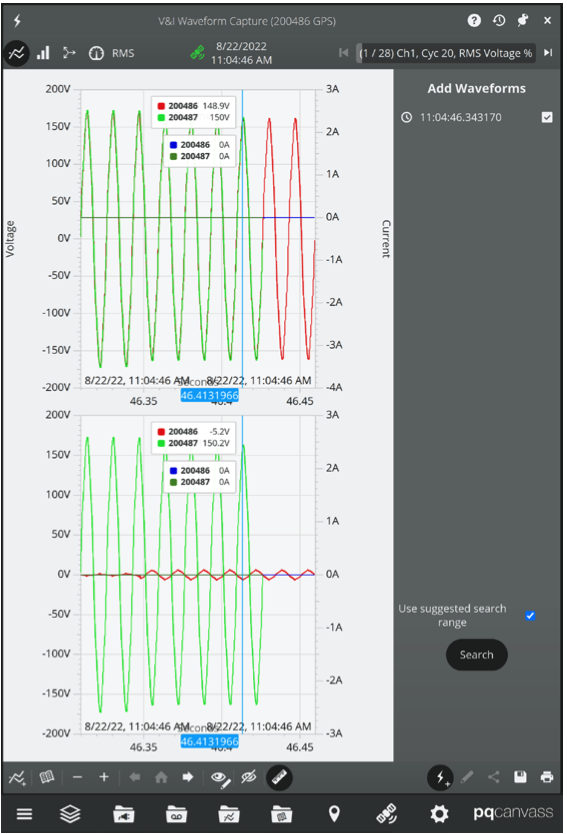
GPS timestamped waveforms are only available to a Seeker that is locked onto a minimum of 3 satellites. No high-resolution timestamps will be available otherwise.
3D Harmonics
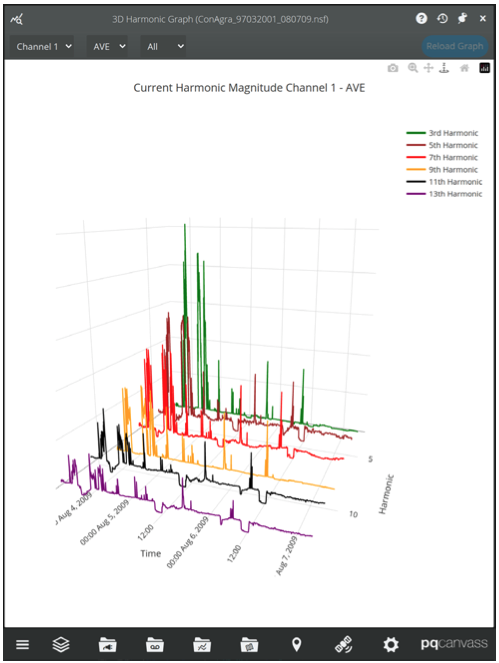
In a recording with harmonics traces enabled (if supported by the device), a 3-dimensional waterfall graph is presented with harmonics in the recording. If one wishes to view harmonics past the 51st, a single click of the button allows this.
Graphs
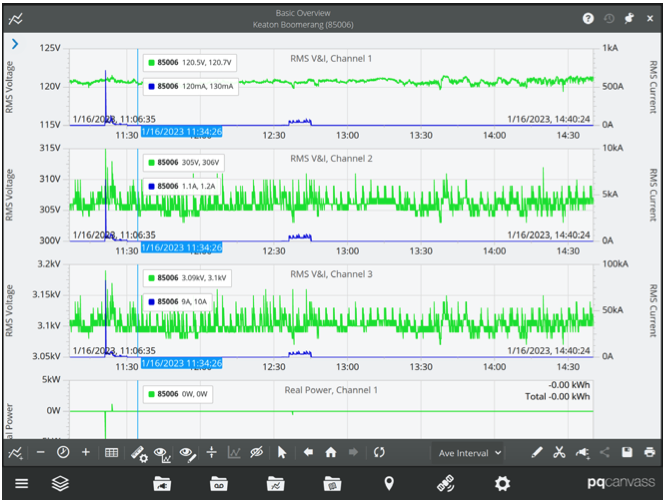
PQ Canvass provides several types of graphs – such as interval, histogram, and vector – as well as a multitude of options and tools to provide an unparalleled look at the data our devices provide.
Templates
As the need for more customized and granular control increases, graph templates become more useful. These templates can be defined in the Graph Template Editor, and then shared to other accounts/users. In the bottom toolbar of a graph is the option to open the current graph into the editor. Once in the editor, any changes can be applied just to the graph you are viewing, or can be exported as a graph template to be used later.
Multi-Device Analysis
Viewing streaming data from multiple devices at the same time requires only a few clicks, and allows a user to, for example, overlay multiple traces to correlate load patterns, faults, voltage sags and swell, interruptions and other events over a large geographical area.
Annotations
Graphs can be annotated for noteworthy sections in a recording. Text and graphics can be applied for easy reference for other team members, or for later viewing.
Customization
Various tools for customization, such as the quick hiding of specific traces, channels, or measures; or the scaling of those traces, channels, or measures.
Reports
Some data is best represented as a report, and PQ Canvass has plenty of options at one’s disposal. Whether it’s viewing graphical data in report form, or generating detailed industry-standard reports, PQ Canvass is second-to-none.
Both streaming data and recording data can be used to generate reports.
IEEE-519
Various versions of the standard are available, including the 2022 standard.
Graphs
Graph data can be used to generate a report, including waveform captures. This would produce the values at each point in the graph in an easy-to-read format.
Settings
Whether an administrator or a user, tailoring the PQ Canvass experience or utilizing the full power of our software is as easy as ever.
Notification Lists
If you are an account administrator, notification lists can be created that update specified users of events or alerts for various devices. Aggregation of these notifications can provide a summary of occurrences in a specified amount of time, allowing one to get to the important details quickly.
These notifications can be delivered by email, SMS or, if the user prefers, both.
Sharing Management
Objects shared with other accounts and users can be managed, such as revoking access to a shared recording. Account administrators have additional functionality, such as being able to revoke any object shared from any user of the account.
Conclusion
PQ Canvass is the premiere, next generation power quality analysis application available from Power Monitors, Inc. Whether you are on a desktop or on a smartphone, viewing and analyzing data has never been easier. Our smart analysis software handles the complicated details so you can focus on what’s important.