Abstract
Prior to recording, PMI recorders have a countdown interval of time used for initialization called the “Two Minute Countdown”. This period of time is used to verify proper hookup, change CT range, determine nominal voltage, and make sure everything is connected correctly before the recording starts.
This whitepaper will discuss the countdown, when it is started, what is done during this time, and how it is affected by user actions.
Countdown Actions
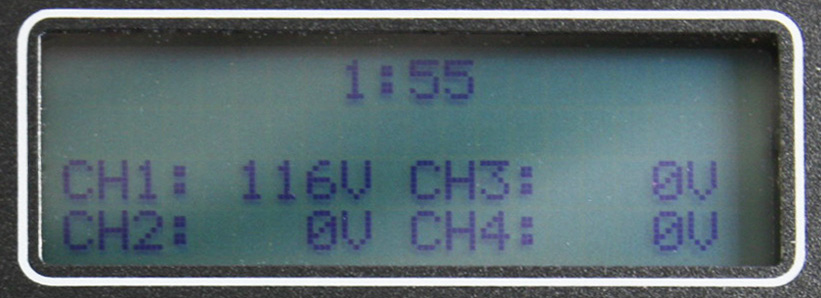
After being initialized, the recorder goes into countdown after being switched to ready mode. Normally, if initialized in the office on USB/cable power, then depowered, the recorder doesn’t start countdown until powered on in the field with AC voltage. The recorder will obtain its operating power from the voltage between Channel 1 (BLK) and Common (WHT) leads. As soon as voltage is applied between these two leads, the recorder begins a two-minute countdown (Figure 1).
During this countdown, the recorder will sample the voltages on each channel in order to set the nominal voltage for the recording period. The recorder also uses this time to detect which inputs are connected.
Viewing real-time readings in Provision keeps the countdown reset at 2 minutes. Pushing buttons on the front panel does the same thing on the Vip or other PMI products with a keypad. The intent here is that if you’re actively looking at readings to verify hookup, etc. the countdown is extended as long as you need. While the countdown continues, you may adjust some recorder settings. However, making a change to the recorder settings will restart the countdown at two minutes. If the recorder goes into standby (e.g. with ProVision), when it returns to ready mode the countdown restarts.
Battery ride-thru is disabled during countdown. If power is removed, the recorder will shut off. No data is sent to Canvass during the countdown for Revolutions.
The previous recording may still be downloaded even after initialization, and is still available all the way until the end of the countdown. When the countdown ends, the previous recording is erased, and a new one begins.
The period of time used in the countdown depends on recorder model and user actions. The countdown on some products is only 1 minute – plugin (Eagle 120, VP-2, VP-1), socket recorders (Guardian, iVS-2SX), and SVM. For them, there are no CTs to manually connect, and for the plugin and socket recorders less opportunity for connection problems, since you just plug them in.
When power is lost while a recorder is recording, the recording will be continued when power is returned and the two minute countdown will not occur.
Connecting CTs
The recorder automatically detects the type of current transformer (CT) connected during the two-minute initialization countdown which starts when power is applied to the unit.
Current range may only be changed during countdown – at the end of the countdown the range in use then is locked in. If set with software, that range is selected at the beginning of the countdown, but may be changed manually.
During the two-minute countdown, you may exchange one type of CT for another for the Eagles and Revolutions. However, if you change the CTs after the two-minute countdown has expired, you must restart the two-minute initialization countdown. If CTs on an operating recorder are exchanged with CTs of a different type without re-initializing the recorder, the unit will retain the setting of the first CTs as the operating type. This may result in incorrect measurements. It is also important to remember that if the CTs are not connected until after the two minute countdown has expired, the unit will not detect that they are connected, resulting in inaccurate current measurements.
Connecting the Recorder

It is important to connect channel 1 voltage lead last since this will start the two-minute countdown for recording. This connection sequence will assure that all measured voltages and currents begin recording simultaneously, and will prevent false event triggering that could occur during voltage lead or CT connection.
At the end of the two-minute countdown, the old recording is deleted and a new recording is started. Up to this point, the recorded data is still in the recorder and can be downloaded again even after it has been re-initialized if you have not yet begun a new recording session. The data is not erased until the end of the two-minute countdown of the next recording session.
Most recorders give an indication of the two-minute countdown. The LED on the side of the Eagle or Status LED on the front of the Revolution will blink for one second every other second while it is in its two-minute countdown. Once it has completed its two-minute countdown and starts recording, the LED will blink once every six seconds. The Eagle 120 and Guardian LED operation is the same as the Eagle. The Vip, 600P, and SVM indicate the countdown on the front panel (Figure 1).
Determining Nominal Voltage
One of the actions performed in the two minute countdown is to determine the Nominal Voltage used in several of the reports. To determine the nominal voltage, the recorder is initialized with a list of potential nominal voltages (such as 120, 240, etc.), with low and high voltage thresholds for each. The actual nominal is picked by the recorder during the two minute countdown. The average voltage during the countdown is compared to each of the nominals; the closest one becomes the nominal voltage for the entire recording session.
There are five standard nominals in the software setup (120, 208, 240, 277, and 480 volts), and two custom nominals. The custom nominals can be set to any voltage. It is possible to enable and disable the standard and custom nominals. For example, if it is necessary to force the recorder to use 230 volts as the nominal, the standard nominals should be disabled, and both custom nominals set to 230. If the standard nominals were not disabled, there would be a chance for the recorder to pick 240 volts during the two minute countdown, if the line voltage happened to be running closer to 240 than 230 at that time. The nominal is chosen by the recorder separately for each voltage channel.
Several ProVision reports use this nominal voltage for triggering events. This includes the Significant Change, Loose Neutral and CBEMA reports. This does not include the Event Change report. The Event Change Nominal voltage is specified by the user, and is not picked by the recorder.
Conclusion
The “Two Minute Countdown” is a period of time used for initialization for PMI recorders. The time interval changes based on recorder model and user actions. The countdown starts when the recorder is switched to ready mode or when power is applied between the Channel 1 and Common leads. During the countdown, the recorder is initialized, the current range is determined and the nominal voltage is set.
