Abstract
We’ve added a major enhancement to ProVision – the ability to sync recordings with PQ Canvass, PMI’s cloud-based PQ data analysis system. The implications of this are profound because you can now access your previously “local only” files via the PQCanvass web interface, easily share data with others, and access PQ information on any device with a web browser and Internet connection. You can unlock all the benefits of portability starting with ProVision 1.70 build 6653.
Overview
There are several reasons to upload ProVision recordings to PQCanvass. Uploaded files allow for the sharing of recordings with users that have the same PQCanvass account. Uploaded recordings can also be graphed in PQCanvass allowing side by side graphing with Boomerang data, and other recordings.
PQCanvass can be used as a central repository for ProVision recordings allowing you to view recordings from diverse locations and differing devices without the need to install ProVision. This is possible because PQCanvass is web-based, allowing users to use devices, such as tablets, that cannot run ProVision. Another benefit is that PQCanvass can replace localized central repositories that require IT departments to setup.
When ProVision recordings are transferred to PQCanvass, they are converted to the newer NSF recording format for transfer, if they are in the older XSB or XSF formats. The original recording is left in place in its original format. The NSF format is required for viewing in PQCanvass.
Uploading Recordings
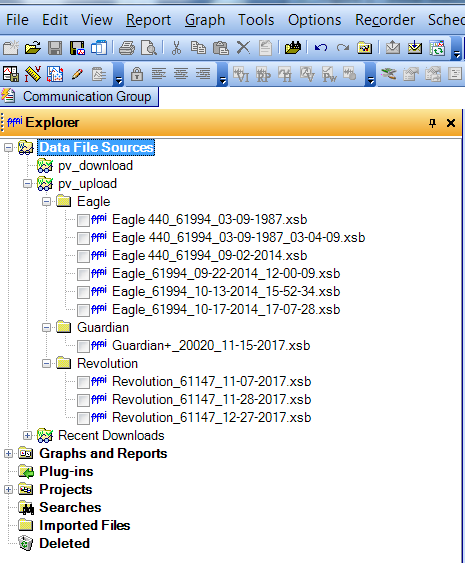
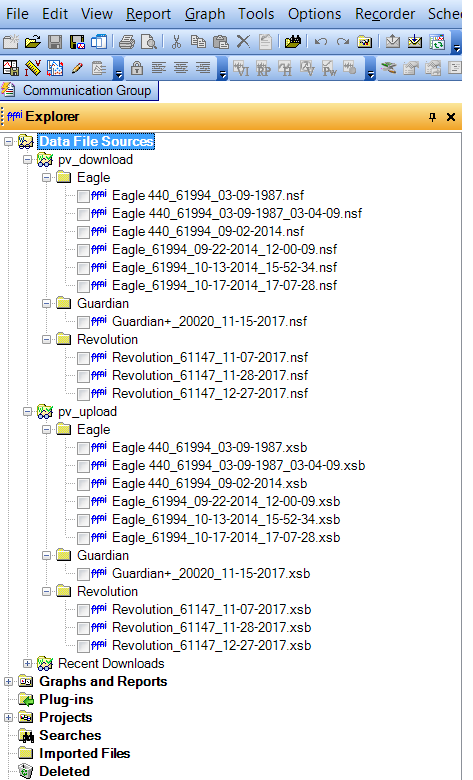
In ProVision, recordings are transferred to and from Watcher folders. The Watcher folders are listed under “Data File Sources” on the main ProVision window. Figure 1 shows the “Data File Sources” list with the default Recent Downloads Watcher and the two Watcher folders added for this paper. For this paper, I also added pv_upload and placed recordings for uploading as well as pv_download for the downloaded recordings. If you want to add new sources/destinations for file transfers, add watchers to the “Data File Sources.”
Choose the File -> PQCanvass menu to bring up the PQCanvass transfer dialog as shown in Figure 2. When one of the Watcher folders is clicked, any subfolders and ProVision recordings contained in that folder are displayed.
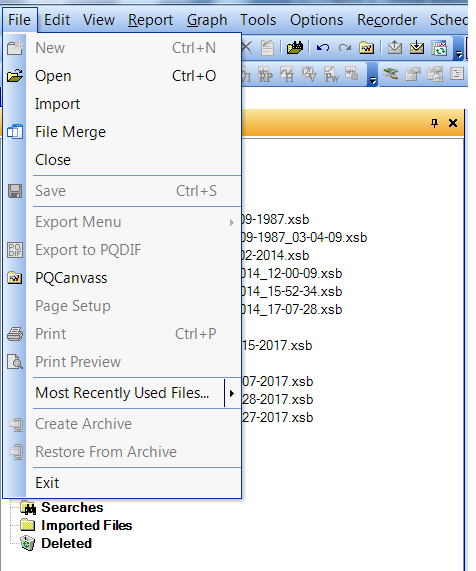
Figure 3 shows the expanded subfolders displayed when the pv_upload Watcher folder is clicked.
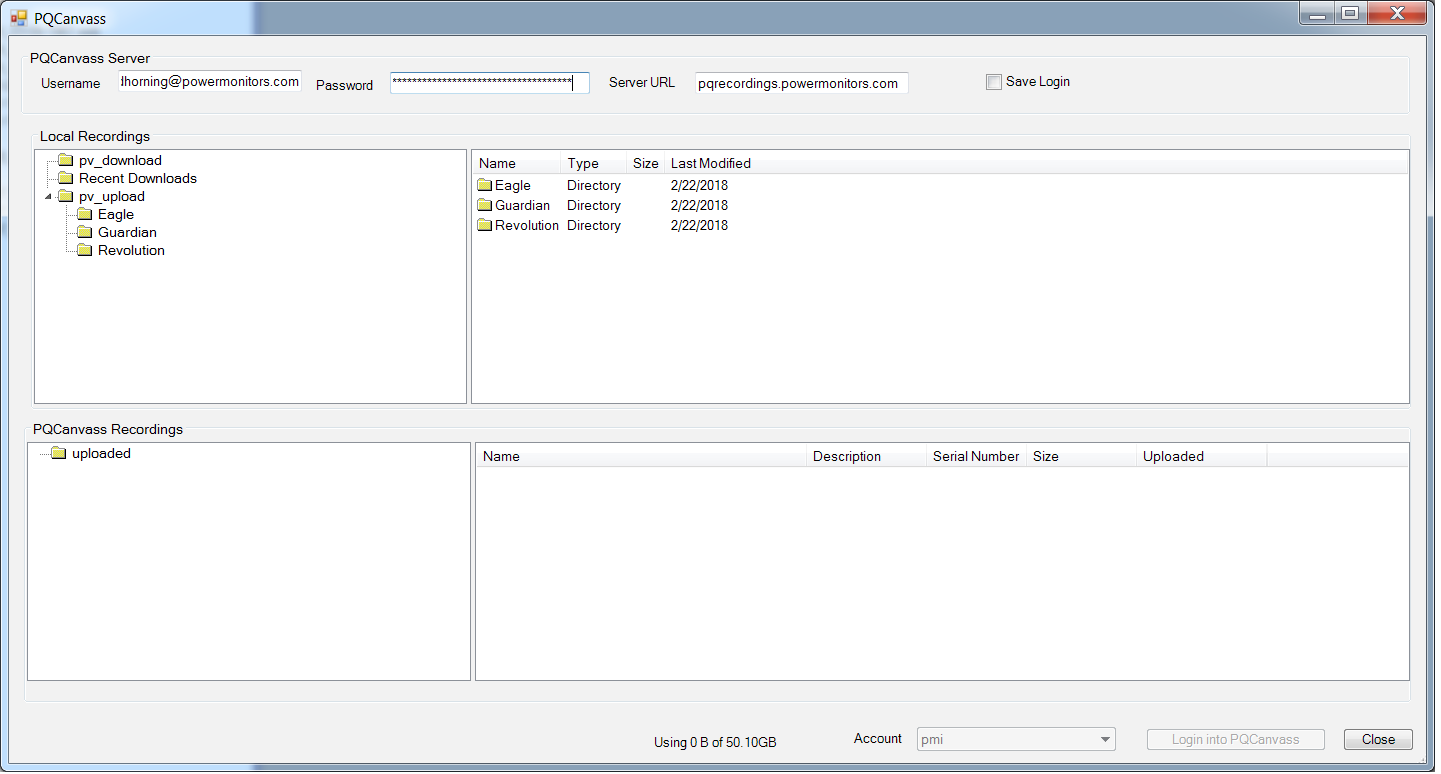
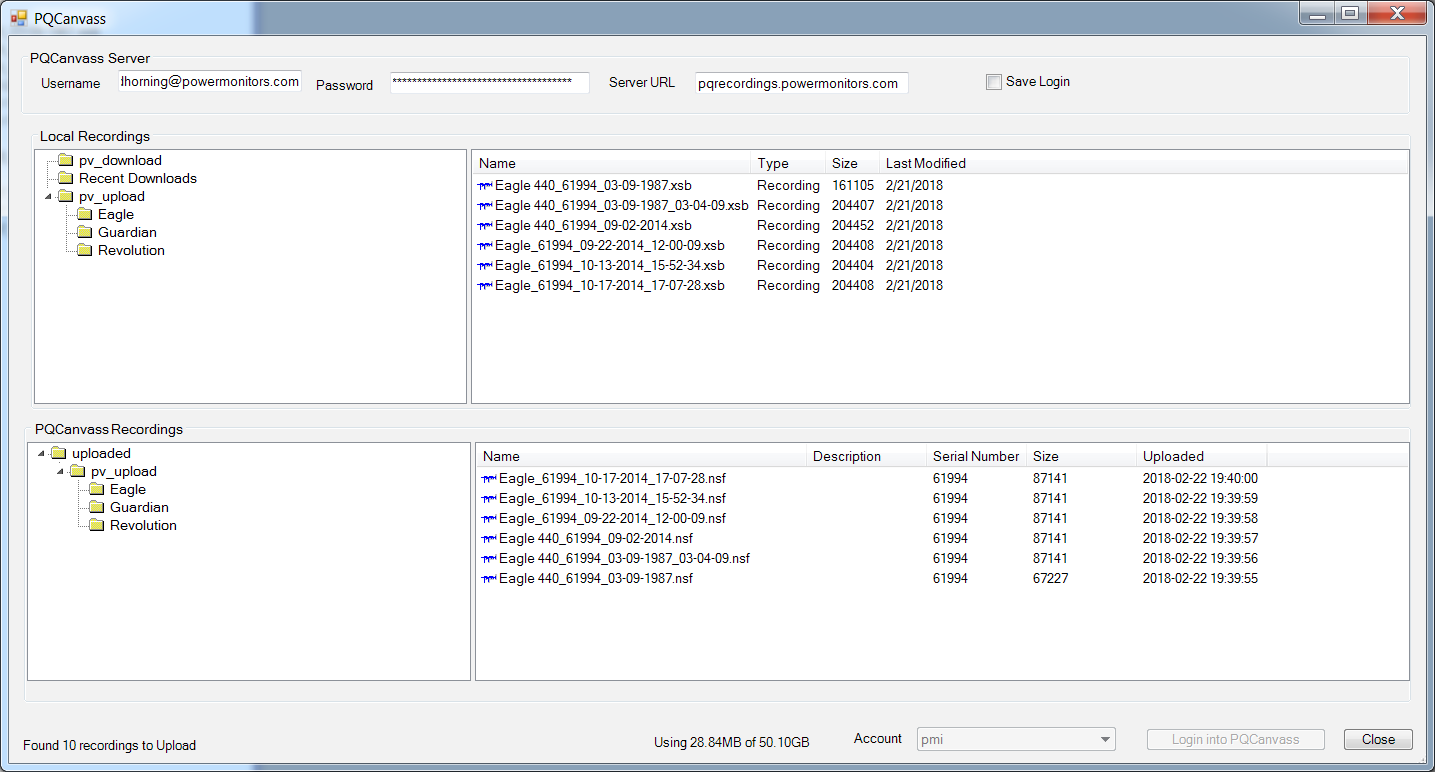
The next step is to enter the PQCanvass account username and password and press the “Login into PQCanvass” button. After logging in, the PQ Recordings treeview (lower left) shows the uploaded directories. This tree initially has only the default “uploaded” directory. The PQ Recordings listview (lower right) shows any recording or subdirectories under the selected PQ Recordings treeview item. After login you can also see the amount of available storage used.
Folders and recordings can be dragged from the upper treeview and list views to the lower listview. Figure 4 shows drag direction. Once dragged, the PQCanvass Upload dialog is shown displaying the selected recordings. Figure 5 shows the PQ Canvass Upload dialog along with recordings, displayed from dragging the pv_upload watcher folder to the PQ Recordings listview.
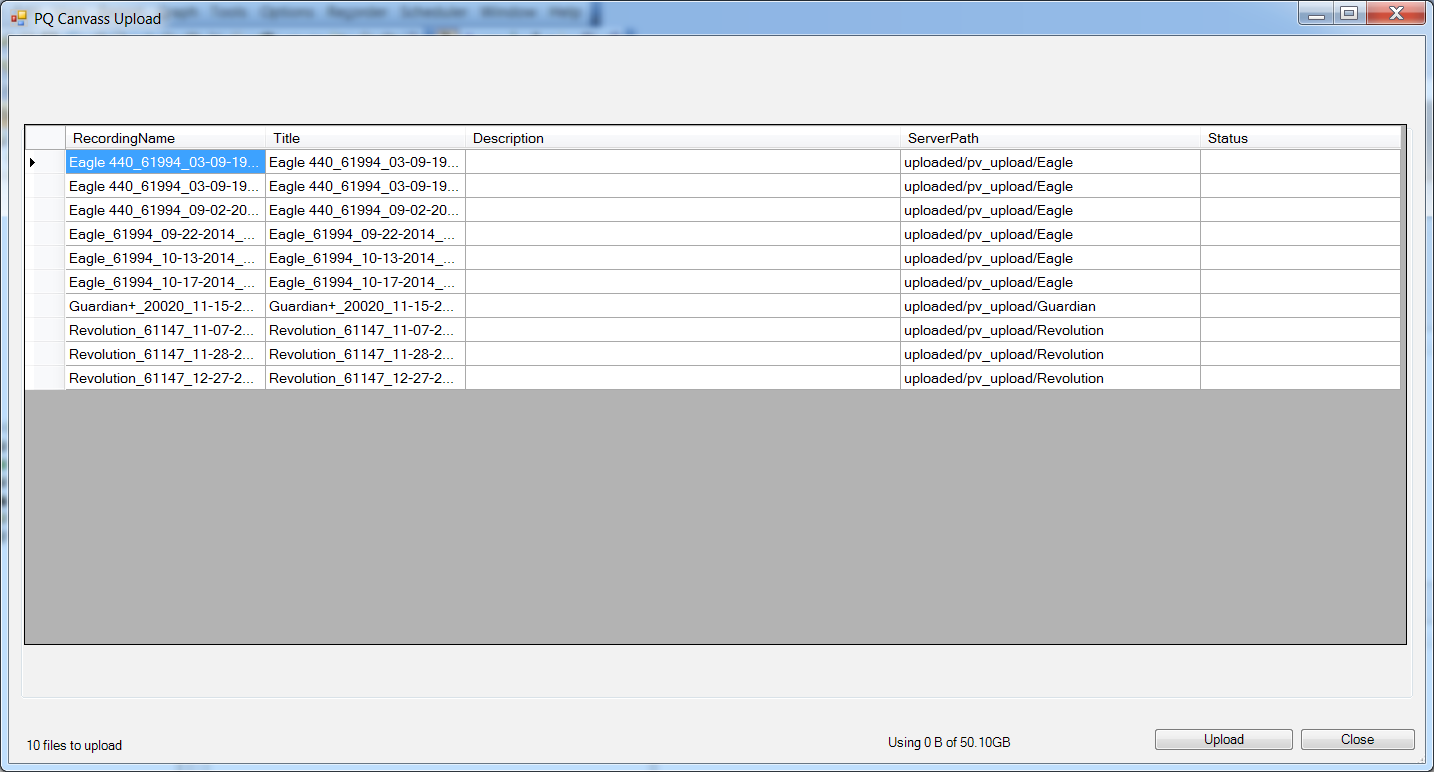
The PQCanvass Upload dialog shows the ProVision recordings that will be transferred to the PQCanvass server. There are several columns of data. The Recording Name column contains the filename of the recording. The Title column is the filename that will be shown on the PQ Canvass server. The Description column is a description that is sent with the file. The description can be used to describe the recording and is shown on the server directory listings. The Server Path column is where the recording will be stored on the server. The status field is used to show transfer status. If desired, the Title, Description, and/or Server Path fields can be modified at this time.
When the upload button is pressed the recordings are transferred to PQCanvass.
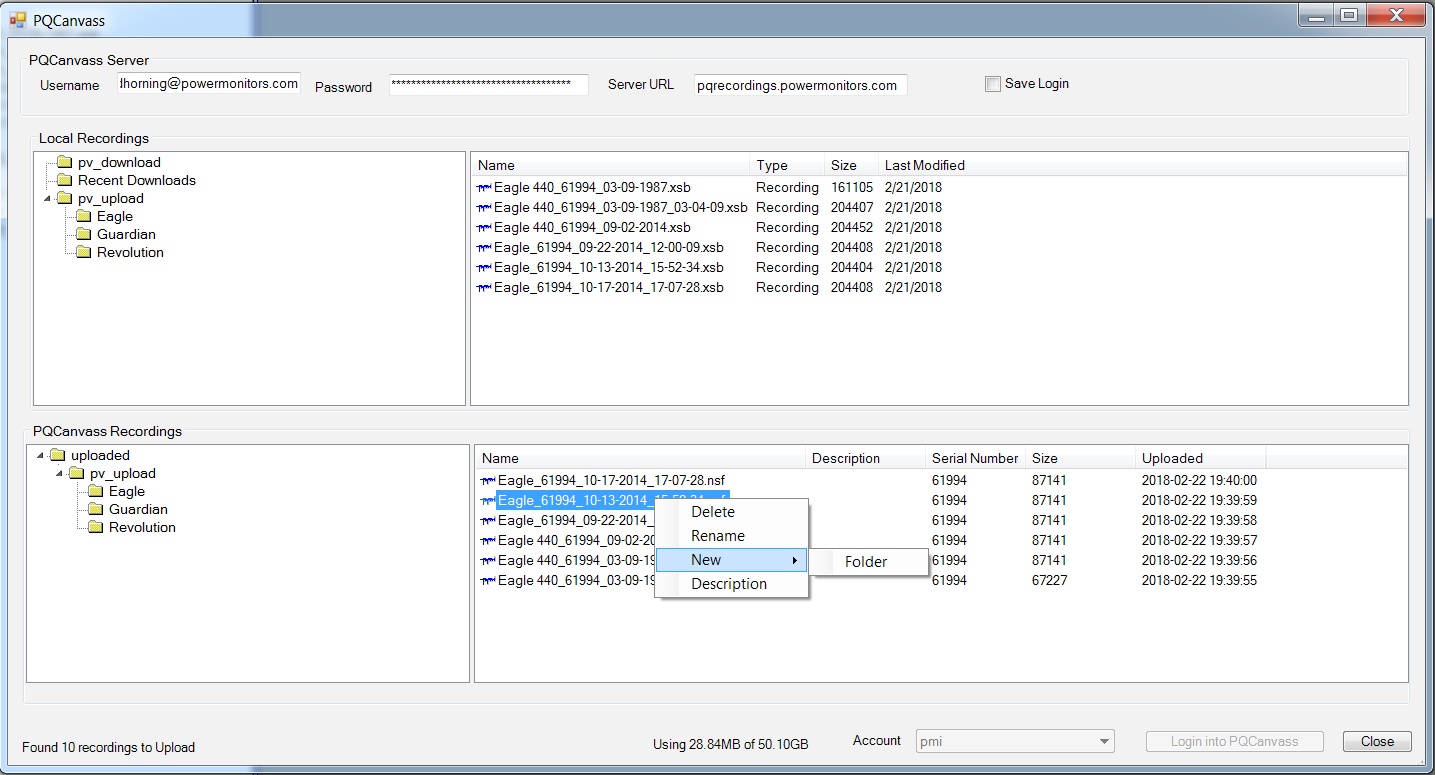
When the PQCanvass Upload dialog is closed the PQCanvass dialog is updated to show the server status and the uploaded recordings (see Figure 6). If you right-click on a server recording you can change its name, description, or delete it (see Figure 7).
Downloading Recordings
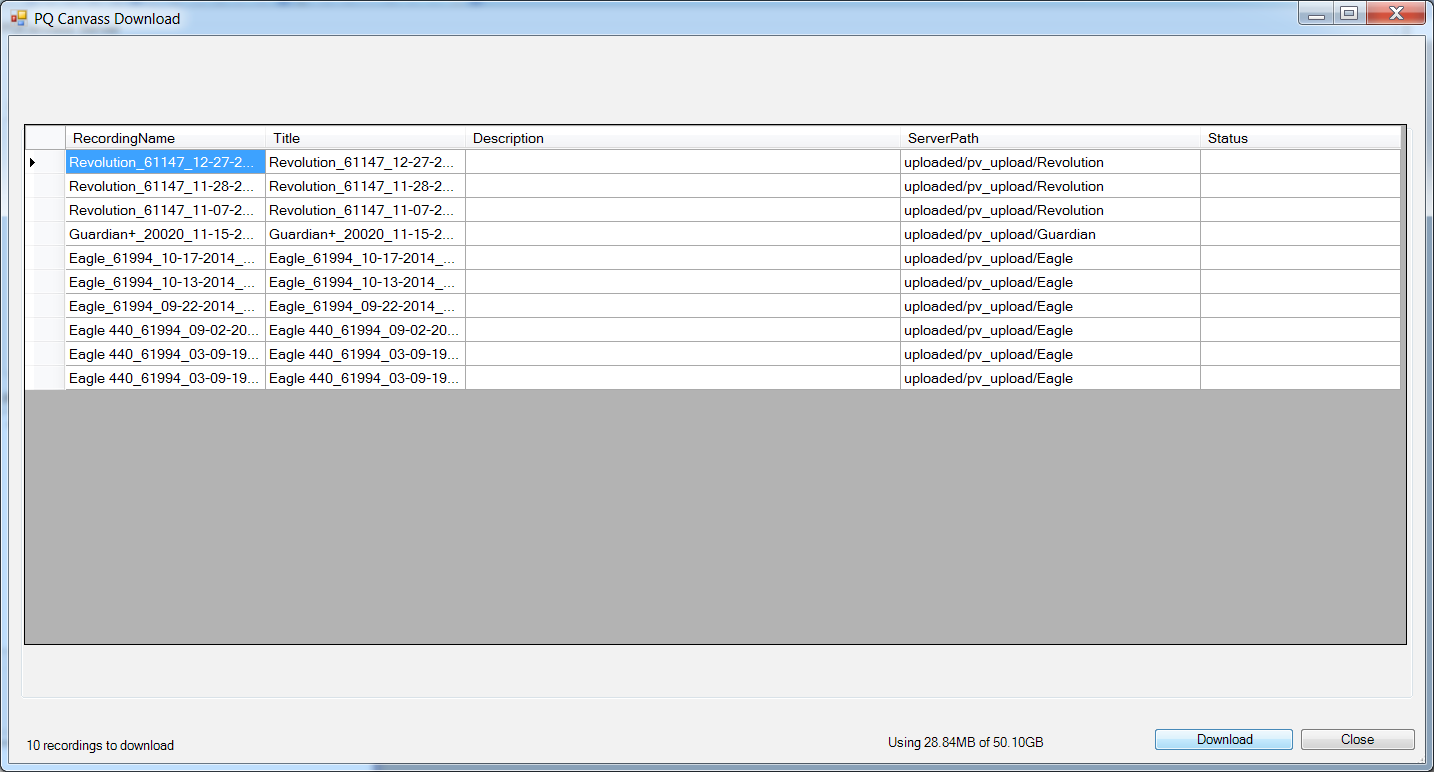
Downloading recordings are done in a similar manner to the uploading process. Drag directories or recordings from the PQCanvass treeview or listview (bottom left and right) to the Local Recording listview (top left). The PQ Canvass Download dialog will be displayed with the recordings to be transferred.
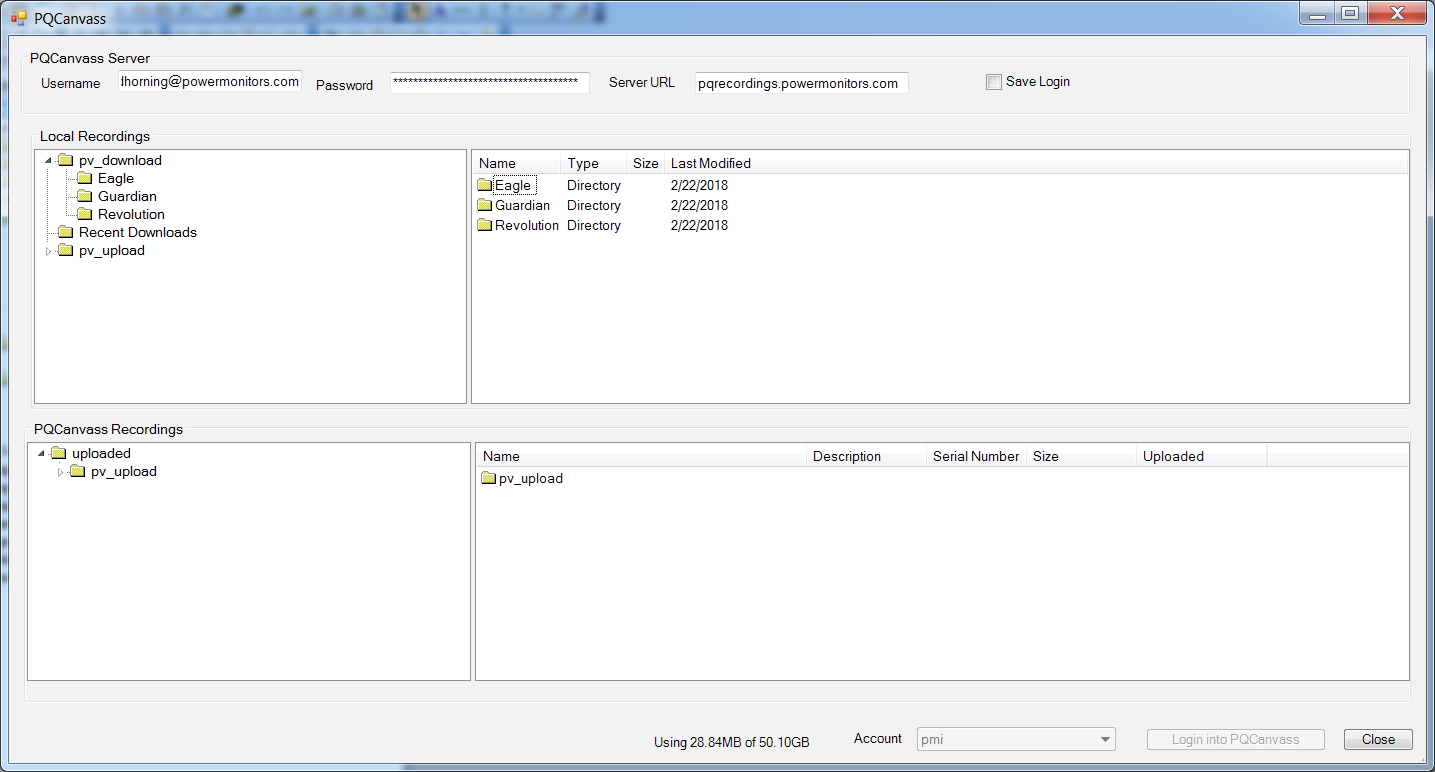
Figure 8 shows the PQCanvass Download dialog that results from dragging the pv_upload directory from the PQ Canvass Recordings listview (bottom right) to the Local Recordings listview (top right). Figure 9 shows the resulting PQ Canvass dialog and Figure 10 shows the Data File Sources watcher folder in the main ProVision window. Note that the directory structure is the same and the extension on the recordings is now NSF.
Viewing Recordings in PQCanvass
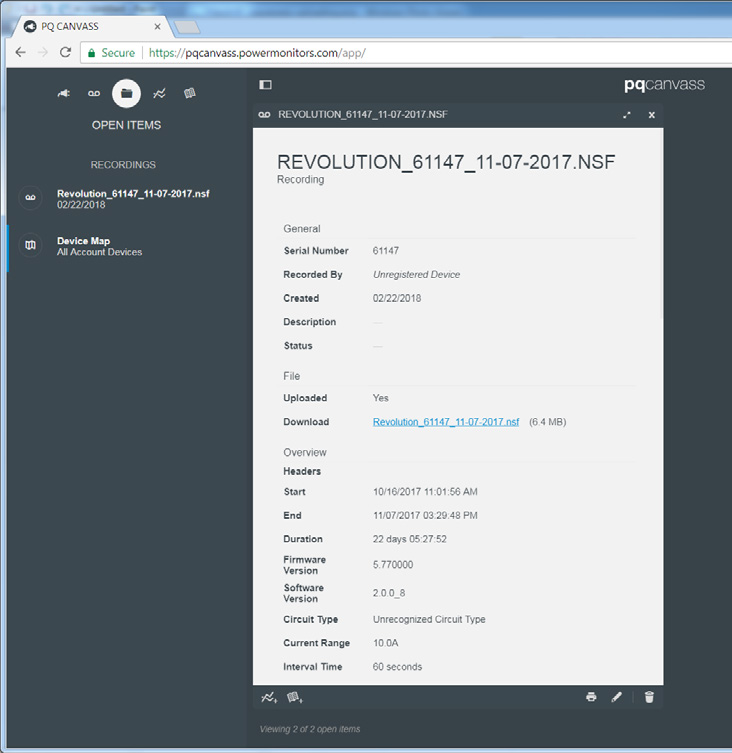
Uploaded recordings show up in the recording list in PQCanvass. Figure 11 shows the header report of an uploaded recording. These recordings can be used to run PQCanvass graphs and reports. Also, PQCanvass can be used to download these recordings allowing PQCanvass users to view recordings downloaded with ProVision.
PQCanvass can run on web-enabled devices that are not capable of running ProVision, allowing more options for viewing and sharing recordings.
Conclusion
ProVision now has the ability to transfer ProVision recordings to and from PQCanvass. These recordings can be analyzed with PQCanvass, stored in the cloud, and shared with other ProVision users.
