Abstract
Harmonic stripcharts can generate huge amounts of data. When using harmonic data outside of ProVision (for computing system-wide TDD, comparison with other data sources, etc.), a way is needed to export the stripchart data in bulk. The standard method involves creating a custom graph/report template, generating the report, then exporting it.
While this is sufficient when dealing with a small number of traces, the process can quickly become tedious when wanting to create large data sets (e.g. all harmonic magnitudes for all channels). For this purpose, Power Monitors has created a utility that can extract data from recordings using a custom template and write these data to comma-separated value files, or CSV, without the overhead of needing to run ProVision or manually perform the intermediary steps. This whitepaper serves as a demonstration and overview of the use of this utility to extract bulk data. Although the primary use is for exporting all recorded harmonic data in one large CSV file, the method can be used to export any combination of stripchart data sets.
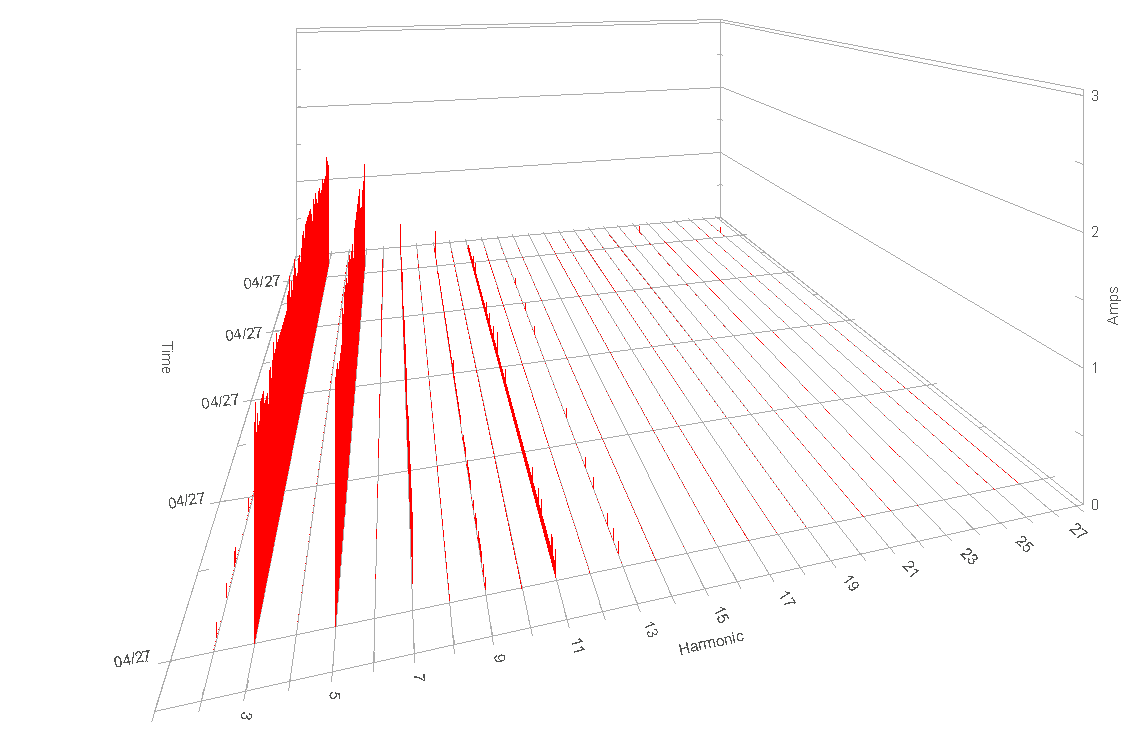
For this whitepaper, a real data file was used, where all harmonic voltage and currents, magnitude and phase, were recorded for harmonics 1 through 27, for four channels, with a 15 second interval. This gives 27 x 4 x 2 x 2 x 3 = 1296 different traces (27 harmonics x 4 channels x 2 input types (voltage, current) x 2 quantities (magnitude, phase) x 3 types (min, max, ave). Although the data is easy to visualize in ProVision (e.g. Figure 1, a 3D plot of current channel 1, fundamental turned off), exporting the data is much easier with the Bulk Export Tool.
Installation
This utility is distributed as a zip archive. The archive contains the utility itself as an executable, a required library, and a file with a .EVM extension. The former two are required for the utility to run, while the latter is a premade custom template which contains several unique report formats. This EVM, or any other, can be used to generate reports by the tool.
To use the utility, extract the contents of the archive into the folder that ProVision is installed in, typically “Program Files\Power Monitors, Inc\ProVision”. Users of 64-bit operating systems will need to navigate to “Program Files (x86)” instead; the rest of the path is unchanged. Writing these files will require administrator privileges. Additionally, no group policy must be in place which prevents writing to the Program Files directory structure.
Once the files are unzipped from the archive, invoke the utility by simply double-clicking the utility name, XSB_CSV.exe. However, this requires navigating to the ProVision installation directory whenever the utility needs to be used. This can be circumvented by creating a shortcut. To do this, while having a Windows Explorer window open in the folder containing the utility, right-click the utility and select “Create Shortcut”. Windows will prompt to place the shortcut on the desktop.
Once it is placed, open the Start Menu and right-click the option for All Programs. From the resultant context menu, select Open All Users. This opens a new window representing the contents of the Start Menu. Navigate into Programs, then ProVision. The previously-created shortcut can be dragged into this window. Once it is there, the shortcut will appear in the flyout for ProVision in the Start Menu, making it easier to access for future use.
Using the Utility
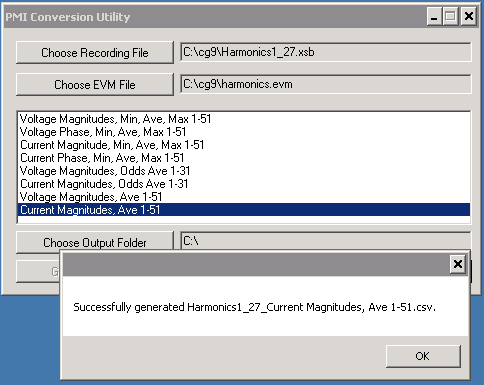
The utility requires multiple fields to be specified first: a ProVision recording file (with a .XSB extension), an exported custom template file (with a .EVM extension) and an output directory. Each of these can be specified by using the corresponding buttons in the UI. Note that when the EVM file is loaded, it is automatically parsed by the utility and the available templates are displayed (Figure 2). From here, just choose the custom template to apply, then click “Generate CSV File”. This automatically opens specified XSB recording file, extracts the requested data from it, builds CSV according to the chosen template, and writes it to a file in the chosen output directory.
The resultant file will be a combination of the recording file name and the title of the selected template, and will have a .CSV extension. To generate a different file from a different template, select the new template and click Generate once more. This makes it easy to generate multiple CSV files from a single recording. The automatically generated file name also makes it easy to see its source and contents.
Note that multiple templates can be selected. To choose more than one, hold down the Control key while selecting the additional templates. When Generate CSV is clicked, the utility will create a separate file for that recording for each selected template containing the appropriate data. Note the time this takes may vary based on the size of the recording file and the complexity of the requested data. When the operation completes, a new active file can be used with the same selection of templates.
Example
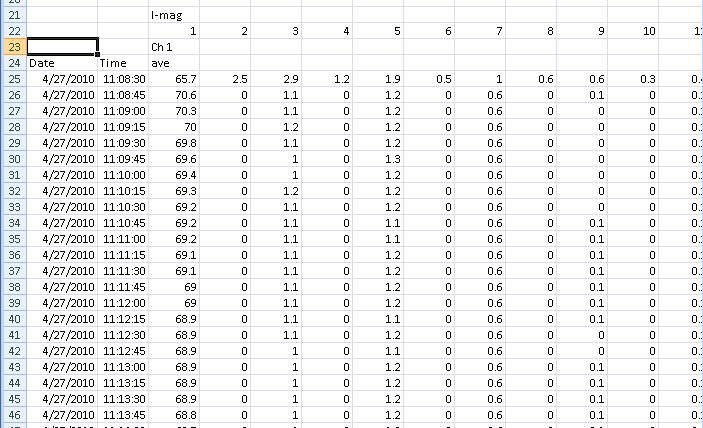
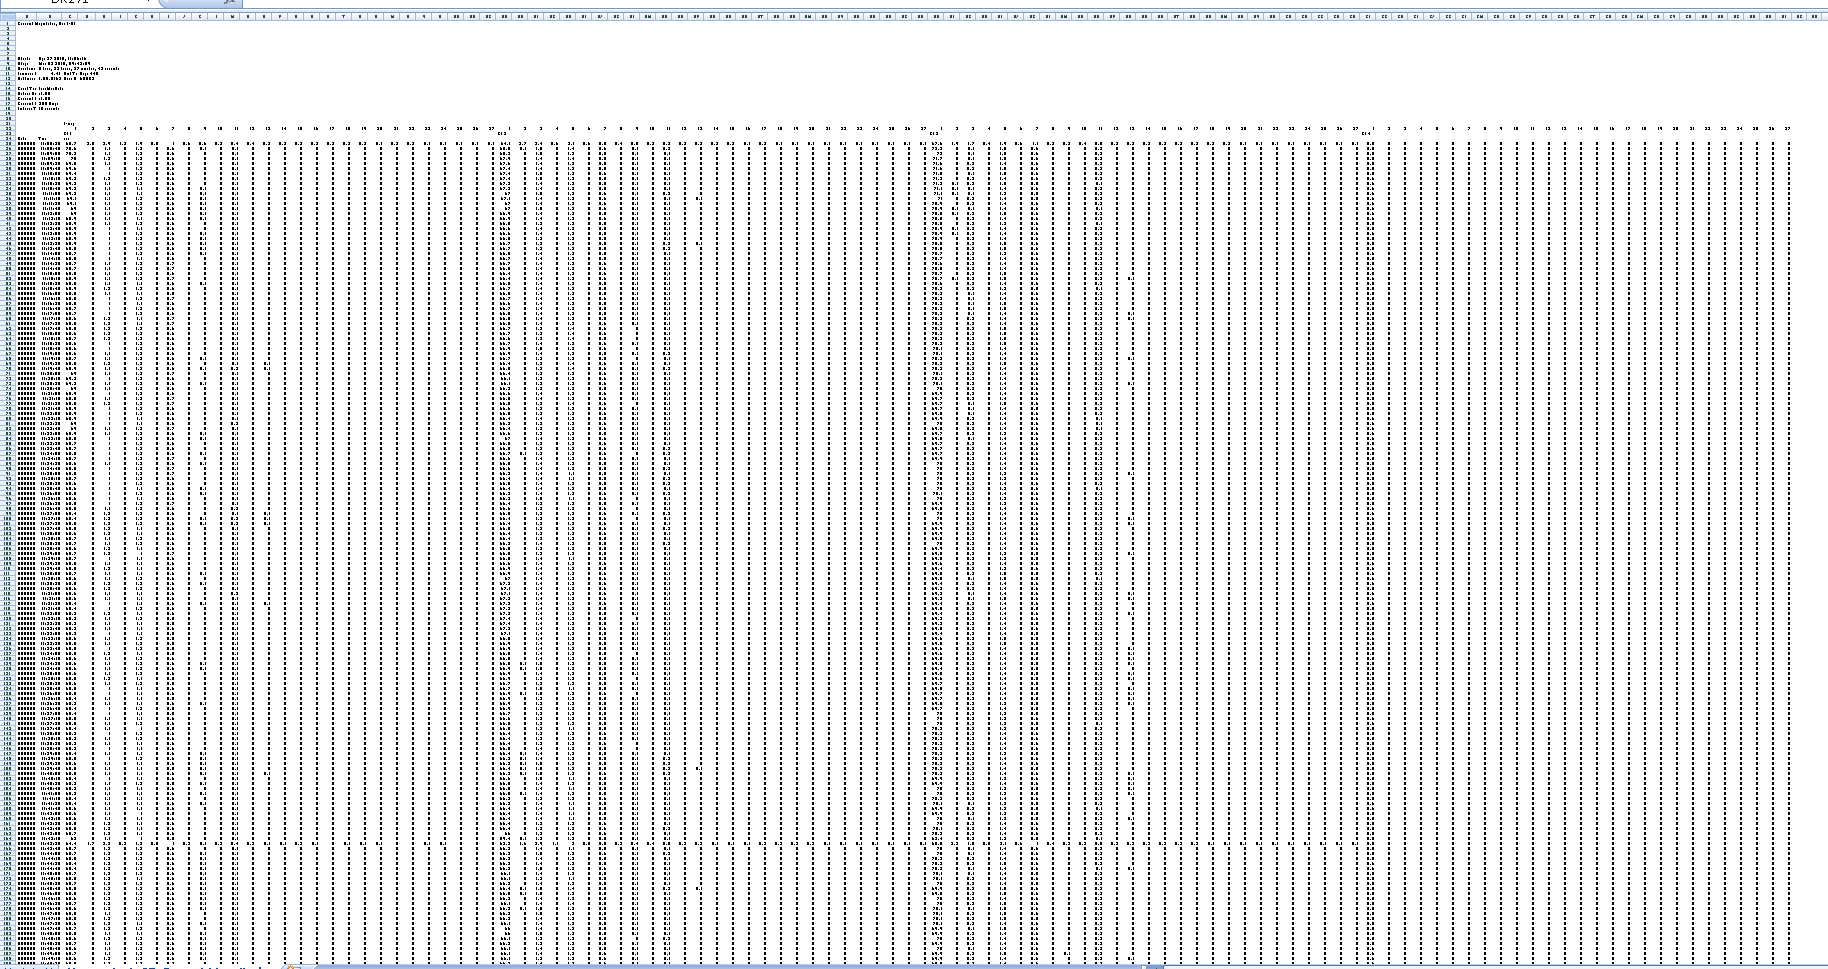
The recording mentioned earlier is used in this example. In Figure 2, the current average magnitudes have been chosen for export, and the dialog box indicating success is shown. The exported file can be loaded into Excel, or any other application capable of reading the universal CSV format. In Figure 3, the beginning of the CSV file is shown in Excel. Here the Channel 1 current magnitudes are shown, starting at the 1st, and continuing to the right. Each CSV column is dedicated to one measurement type (e.g. channel 1 current 1st harmonic magnitude, average), as labeled with the initial header rows. Zooming out in the spreadsheet (Figure 4) reveals the entire dataset – 27 columns for 4 channels 108 columns total.
The EVM file used need not be the one included in the archive. ProVision can be used to tailor-make EVM files. In ProVision, under the Graphs and Reports node in the Explorer Tree, select the templates to include. Multiple templates can be selected by holding down the Control key while clicking them with the mouse. It is recommended that each template have a strong name and title so it can be easily differentiated from the others when used in the utility. Right-click the selected templates and, from the resultant context menu, choose the “Send by E-mail” option. In the dialogue box that appears, choose the option for “Save to an object you could send later”. Then, enter a path and file name. This creates a zip archive containing the generated EVM file. This EVM file can be extracted from the archive and used by the utility similarly. This allows ProVision to work in tandem with the utility such that the former can create, modify, and export templates, while the latter can apply said template to multiple recording files quickly and efficiently.
Conclusion
For circumstances in which large amounts of data require analysis outside of ProVision, and exporting from within ProVision is too time-consuming, using this utility can be a fast and efficient way of extracting multiple sets of data from multiple recordings. Once extracted, the CSV data can be used in a wide variety of ways, including having scripts applied to them or being analyzed in third-party applications.
