Abstract
ProVision, PMI’s Power Quality Analysis PC software, has undergone several overhauls and upgrades over the past several years. During this time, a number of different file formats and file types have been created, re-designed, altered and even replaced. One of the most recent conversions is the change from an XML-based recording format (the XSF files) to a binary recording format (the XSB files).
While ProVision does have the capabilities to do “in-place” conversions, this can be slow for large files on older machines, and is not useful for bulk-conversions of older recordings that may have been collected over the course of several months or years. This white paper discusses a new command-line based utility provided by PMI that allows the user to manually convert individual XSF files or entire directories of XSF files into the new XSB format for viewing in the newer versions of ProVision (version 1.50 and later).
Installing the Utility
The conversion utility is a simple stand-alone executable file that is not integrated directly with ProVision. To download this utility, please contact a technical support representative by calling 1.800.296.4120 or by emailing support@powermonitors.com.
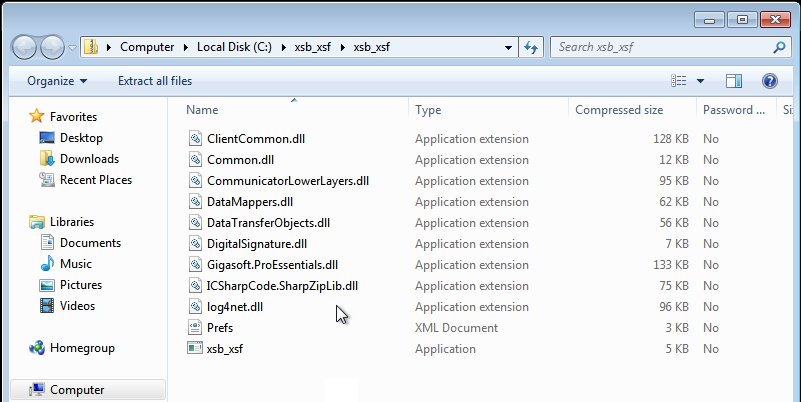
Installation is simple: open the zip file (xsb_xsf.zip) and extract the contents to a directory of your choosing (the author had created a directory c:\xsb_xsf and has extracted the zip file to this location, as shown in Figure 1). It is recommended that the contents of the zip file be extracted to a directory that is easy to navigate to from the command line – this is where the utility must be used. The author recommends not extracting the contents of the zip file to the user’s desktop.
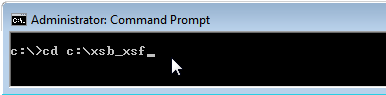
Once the application has been extracted and copied to the hard drive, the next step is to open a command prompt (also referred to as a “DOS prompt” or a “DOS box”). Typically, this drops you at the root of your C: drive, as shown in Figure 2, below.

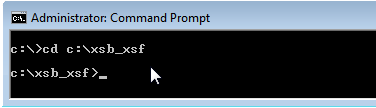
From here, the next task is navigating to the directory where the utility has been installed (Figure 3). On the author’s machine, this will be done by issuing the following command:
cd c:\xsb_xsf
On the user’s machine, this directory may vary. An example syntax follows:
cd [drive]:\[directory where utility is installed]
The example in Figure 3 uses the author’s installation location.
Once the user has changed to the installation directory, a new prompt appears displaying the current path as shown in Figure 4, below. From here, the utility can be used to convert legacy XSF files to the new binary XSB format.
Running the Utility
Once the application has been extracted and the user has navigated to the installation directory, it is ready to be used. Listed below are two examples: one that shows how to convert a single XSF file to an XSB file and one that shows how to convert an entire directory of XSF files.
Example 1
To convert a single XSF file to an XSB file, issue the following command as shown in Figure 5. This assumes that the user has followed the above instructions to extract and navigate to the installation directory as described in the ‘Installing the Utility’ section:
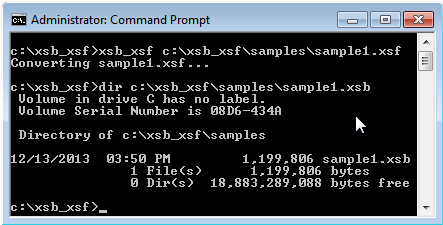
xsb_xsf c:\xsb_xsf\samples\sample1.xsf
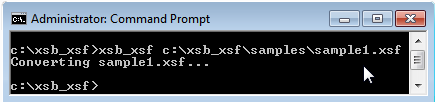
As you can see from the example shown in Figure 5, the application simply notifies the user that the file is being converted and then terminates. To verify that the new XSB file has been generated, the author has issued the following command:
dir c:\xsb_xsf\samples\sample1.xsb
The “dir” (or directory) listing will provide some information about the file that was recently generated such as date/time of creation, file size and path as shown in Figure 6. If the file did not successfully convert, then issuing the “dir” command will exit with a result of “File Not Found.”
Example 2
Assuming that the user has followed the above instructions to extract and navigate to the installation directory as described in the ‘Installing the Utility’ section, it is possible to convert an entire directory (folder) of XSF files to XSB files, by issuing the following command (see Figure 7):
xsb_xsf c:\xsb_xsf\samples\full_directory
This command prompts the user to specify whether or not to include subdirectories in the conversion. What this means is that any subdirectories (or sub-folders) will be traversed when doing the conversion and all XSF files found in the parent directory and all of its child directories will be converted. As an example, if there is a directory:
c:\xsf\
And that directory contains several subdirectories:
c:\xsf\site_1c:\xsf\site_2c:\xsf\site_3c:\xsf\site_4
And the user specifies “y” (for “yes”) at the prompt, then all of the XSF files in site_1, site_2, site_3, site_4, etc. (and any directories that they contain) will all be converted. If, on the other hand, the user chooses not to include subdirectories in the conversion, then only the files in c:\xsf\ will be converted as shown in Figure 7 (and not the files in site_1, site_2, site_3, site_4 and their child directories).
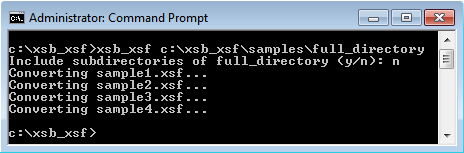
The full directory conversion command will actually list each file that is being converted as it happens. This helps the user ensure that they’re converting the correct directories.
To verify that the files have been converted, the user can issue a “dir” command as was done in the single-file conversion example:
dir c:\xsb_xsf\samples\full_directory\*.xsb
This will list all of the newly created XSB files, the file sizes and creation times/dates as shown in Figure 8.

Tips and Tricks
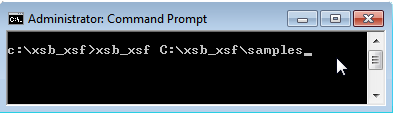
Often times, having a user type out a full path to a directory (or a file) on the command prompt can be very tedious (especially if the files exist in the user’s personal documents directory or even deeper). A quick and easy way to get around this is to use the Windows Explorer to navigate to the directory using a mouse and then “copy and paste” the directory from Windows Explorer into the command prompt. An example can be found below.
First, navigate to the directory that contains the files that the user wishes to convert as shown in Figure 9.
Next, click on the “location/address bar” at the top of the window to change to “select mode” as shown in Figure 10.

Once the path has been highlighted (automatically done by Windows when the address bar is clicked on), right-click in the address bar (or on the highlighted text) and click “Copy”, or, using the keyboard, press Ctrl+C.
Now return to the command prompt where the user had previously navigated to the xsb_xsf utility installation directory. Type the following:
xsb_xsf followed by a space.
Now, from the command prompt’s “control” menu (the command prompt “icon” on the top left-hand side of the window), select the “Edit” sub-menu, then move over and select the “Paste” option and the path you have selected from the Windows Explorer will be pasted into the command line immediately after the xsb_xsf command as shown in Figure 11.
Now press [Enter] to execute the command.
Advanced Users
For users that are more comfortable with the command line, it may be easier to add the directory of the xsb_xsf utility to the system’s path. Doing this will allow the user to navigate directly to the directories that contain the XSF files from the command prompt (instead of navigating to the installation directory) and do an in-place conversion from there. (Note: The user will likely have to be an administrator to perform this task.)
To add the xsb_xsf installation to the system directory on Windows 7:
- Click on the Start Menu.
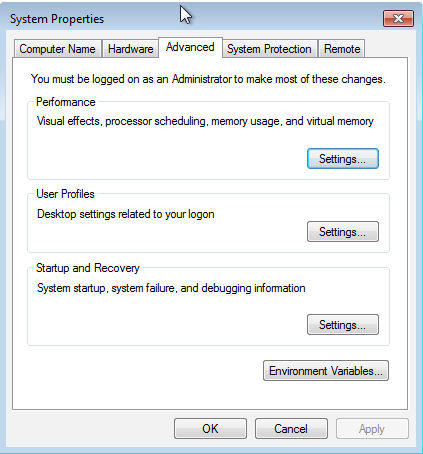
- Right-Click on Computer and select “Properties.” This will bring up the Control Panel as shown in Figure 12. From the Control Panel, select “Advanced System Settings” to bring up the System Properties dialog. This dialog has multiple tabs, but the “Advanced” tab should be selected for you. At the bottom of this window, click on the “Environment Variables” button.
- On the bottom of the Environment Variables window, there is a scroll list of variables (Figure 13). Scroll down and select “Path” and then click “Edit…”
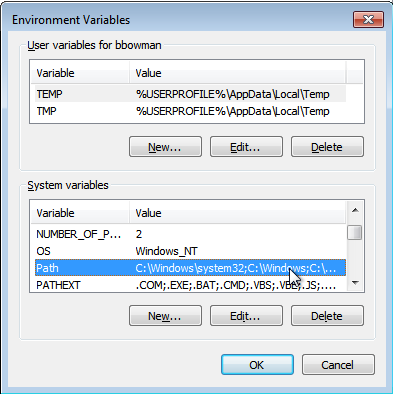
- From the edit window, click inside of the “Variable Value” field, then press the [End] key on the keyboard to go to the end of the text (Figure 14). From there, append a semi-colon followed by the installation path of the xsb_xsf utility (for the author, this path is c:\xsb_xsf\).
- Click OK to save the changes (continue to do this through all of the dialogs) and then close the Control Panel.
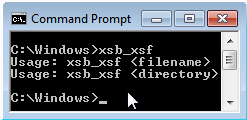
The user should now be able to execute the xsb_xsf utility from within any directory on the system. This can be tested by navigating to any directory other than the installation directory and issuing the xsb_xsf command. The usage for the utility should appear on the console as shown in Figure 14.
NOTE: The user will have to close any open command prompts and re-open them after applying the new path for the changes to take effect in the command prompt.
Important Notes
The paths used in this document are not necessarily the same paths that the users reading this document will use. Whenever “c:\xsb_xsf” is found in this document, the user’s installation path should be substituted.
Additionally, when converting XSF files to XSB files it should be noted that the original XSF files are not altered in any way – they are kept in their original locations without any changes and are not deleted.
Conclusion
The switch from an XML based file format (XSF) to a binary based format (XSB) was essential to the performance of ProVision version 1.50 and later. Making this switch has provided for significantly reduced graph rendering times, report rendering times and disk space usage. Although ProVision will convert XSF files to the new format automatically as needed, a batch process can be useful for converting a library or large collection at one time, for multiple people to access. This tool was introduced to help ease the migration to legacy versions of ProVision to the latest version.
